Showing posts with label free pattern. Show all posts

Saturday, 14 September 2013

Comfy cosy cowl


You may be aware, I'm currently on a gap year, travelling through NZ (the locals call it an OE rather then a gap year but I'm not really sure what that stands for!). So this is my excuse for my woeful lack of posts recently, again, apologies!

Anywho, first thing I did when I finally landed in Christchurch- headed straight to a yarn shop. Yep, the boy went to buy a guitar and I went a few doors down to buy needles and yarn. We'd done a few weeks travelling before getting to NZ, and without my knitting I had to do things like sit still. Not sure about any other knitters out there, but to suddenly find yourself without anything to do apart from sit still was hard. Really hard. I guess my fella felt the same without a guitar to hand, hobbies are just such a part of you it's weird when it's not an option (even for a few weeks!).

Finally, I head lots of pretty, dark grey yarn, and big fat circular needles. I had to think hard about what I wanted to make, we have limited space in the camper (apparently limited for yarn, but not for a guitar, sheesh!), so I didn't want a bulky project, no jumpers or anything. But the South Island is cold this time of year, and with our plan to catch the tail end of winter down by the southern lakes, I figured a big cowl would be perfect. It could go over a shirt or over a coat and still look nice and stylish. And it would be warm, which would be delicious!


The beautiful (cold!) Mt Cook area.

I've not written a pattern in a while, so I wanted to write one for this project. You know, keep the knit-brain ticking over nicely. I hope you like it, it will be perfect for you Northern-Hemispherers to make in time for autumn. If you're Southern Hemisphere, you need to make it sharpish before it warms up too much!


Materials:
10mm Circular needles 80cm long
Approx 170 metres of super bulky yarn (I used 2 balls of Moda Vera Shiver in colour 20)

Legend:
K= knit
P= purl
That's it!

Pattern:
Cast on 130 stitches quite loosely and place a stitch marker. Join without twisting and *K2 P2 repeat from * until end of round.

Next round, purl over the knits and knit over the purls. This should happen automatically if you have cast on exactly 130 stitches. You should start the next round with *P2 K2, and repeat from * until end of round. A pattern will begin to emerge and it will look lovely! Repeat rounds 1 and 2 until the piece measures 8 inches long.

Starting at the begining of round, rib in K1 P1. Continue this for 4 rounds (K on top of Ks, P on top of Ps). The piece should now measure 9-10 inches. You can of course make the cowl longer if you wish. 

Now to cast off, we're going to get a little fancy. Have you ever used the picot cast off method? If not, it's really beautiful. I think it looks like the top of pointy crowns, you know the kind you used to make out of cardboard when you were a kid? And it's easy to learn. There's a bunch of tutorials on the internet, I used the HandKnitted Things tute when I first used this cast off, it's well explained with plenty of photos which is always helpful! 

So, cast off with the picot method, snip yarn and weave in ends. And viola! 

I hope it keeps you lovely and snuggled in the cold months. Don't forget to let me know how it goes on Google+, Ravlery or just at the bottom of the post. I love hearing from you!

HanaLou

l


Thursday, 4 April 2013

Cable-cross my Kindle Heart


I love my kindle. Ever since I was a little child I had my nose in a book, revelling in the adventures of the Famous Five or exploring Hogwarts alongside Harry and his chums. 

I know some old fashioned people out there are against the kindle, but I think it should be embraced. I love books, proper books with a funny smell and creased spines, but reading is a big part of my life. The kindle has made it easy to take hefty books on the train with me, or a number of PDFs to lectures without lugging a folder to campus. I'm going travelling for a year in the summer, and the thought of not being able to take books with me would be awful.

My boyfriend has now also got a kindle, he seems to have never read often, much to my annoyance, but the kindle seems to have changed this. I want this to continue! And that means keeping the kindle safe from harm. Also, chucking it in a rucksack and hauling it around Asia without a cover would just be stupid.

So here is the first of possibly two patterns for a kindle cover. It is written to fit the newer kindle (6 inch screen without the keyboard), however for the older kindle with the keyboard, I will add instructions in brackets throughout.

It has two sides, an intricate cable panel on the front (much easier then it looks I promise, don't panic beginner knitters!), and a cute little heart on the back. Like I said, I heart my kindle! It's made to fit quite snugly so there is no need for a fastener. 


Materials needed:
Skein of DK yarn in desired shade (I used Hayfield bonus dk shade 0891)
3.5 mm dpns, or circular needles
Cable needle
Two stitch markers

Legend:
Pm= place marker
Sm= slip marker
K=knit
P=purl
M1= make one 
Sl=slip stitches
K2tog= knit two stitches together to make one stitch


Cast on 56 stitches

Pm before 1st stitch, K2, P2 rib for 1 inch

Slm k1 m1 k26 m1 k1 pm, k1 m1 k26 m1 k1 (60 stitches)

K 5 rounds (older kindle 10 rounds)

1: P3 *sl3 onto cable (hold in back) k3 k3 off cable repeat from * 4 times p3 slm k30 

2-4: P3 k24 p3 sm k30

5: P3, K3, *Slip 3 to Cable Needle (hold in front) K3, K3 off Cable needle repeat from * 3 more times, K3, P3 sm k30

6-8: P3 k24 p3 sm k30 

Repeat rounds 1-8 twice (older kindle three times)

9: P3, *Slip 3 to Cable Needle and hold in back, K3, K3 off cable needle*, repeat from *  4 times, P3 slm k9 p4 k4 p4 k9

10: p3 k24 p3 slm k8 p6 k2 p6 k8

11: p3 k24 p3 slm k7 p16 k7

12: p3 k24 p3 slm k7 p16 k7

13: P3, K3, *Slip 3 to Cable Needle (hold in front) K3, K3 off Cable needle repeat from * , K3, P3 slm k7 p16 k7

14: p3 k24 p3 slm k7 p16 k7

15: p3 k24 p3 slm k8 p14 k8

16: p3 k24 p3 slm k9 p12 k9

17: P3, *Slip 3 to Cable Needle (hold in back) K3, K3 off cable needle, repeat from * 4 times, P3 slm k10 p10 k10

18: p3 k24 p3 slm k11 p8 k11

19: p3 k24 p3 slm k12 p6 k12 

20: p3 k24 p3 slm k13 p4 k13

21: P3, K3, *Slip 3 to Cable Needle (hold in front) K3, K3 off Cable needle repeat from * twice  K3, P3 slm 14 p2 k14

22: p3 k24 p3 slm k30

23: p3 k24 p3 slm k30

24: p3 k24 p3 slm k30

Repeat rounds 1-8 one more time

K2tog k26 k2tog sm k2tog k26 k2tog

K28 sm k28

K2tog k24 k2tog sm k2tog k24 k2tog

K26 sm k26

K2tog k22 k2 tog sm k2tog k22 k2tog

K24 sm k24

Join edges together using Kitchener stitch.


Fit your kindle inside, and you're good to go! 


Happy Knitting!

Any questions don't hesitate to ask!

HanaLou


Monday, 4 March 2013

Mother's Day Flower Brooch


A quick knit pattern for you today!

Mother's day is just around the corner (in the UK at least), and as I'm not with my mum this weekend to give her an actual bunch of flowers I want to send her some knitted flowers in the post. So here is my pattern for a flower brooch, a perfect treat for any perfect mum :)

Materials needed:
4.5mm knitting needles
tapestry needle
button
2 colours of wool (only very small amounts of each are needed for this project)
thread
safety pin or brooch pin

Legend:
K=knit
P= purl
S= slip
M= make a stitch
KFB= Knit into the front of stitch, do not remove stitch from needles instead knit again into the back of the stitch
P2SSO= pass 2 slipped stitches over
K3tog= knit 3 stitches together as one


For the flower (adapted from Creating Laura's Little Knitted Flowers)


  • Cast on 3 stitches.
  • K1, P1, K1
  • KFB every stitch (6 stitches)
  • *K1, P1 repeat from *
  • KFB every stitch (12 stitches)
  • *K1, P1 repeat from *
  • KFB every stitch (24 stitches)
  • *K1, P1 repeat from *
  • *K1, P1 repeat from *
  • KFB every stitch (48 stitches)
  • *K1, P1 repeat from *
  • *K1, P1 repeat from *
  • Cast off.
As you cast off, the work will curl by itself. Help it to curl by fastening it into a tight coil using the cast-off tail and a tapestry needle. Stitch a button into the middle.

For the leaf.


  • Cast on 15 stitches.
  • P15.
  • K1, M1, K5, S2, K1, P2SSO, K5, M1, K1 
  • P15
  • K6, S2, K1, P2SSO, K6
  • P13
  • K5, S2, K1, P2SSO, K5
  • P11
  • K4, S2, K1, P2SSO, K4
  • P9
  • K3, S2, K1, P2SSO, K3
  • P7
  • K2, S2, K1, P2SSO, K2
  • P5
  • K1, S2, K1, P2SSO, K1
  • P3
  • K3tog.
Stitch the flower and the leaf together, add your safety pin or brooch pin and attach to your coat, your hat, your slippers, whatever you fancy!


Enjoy, and Happy Mothers Day Mum!

HanaLou

x


Sunday, 17 February 2013

Owl go to sleep now. But soon owl be awake!

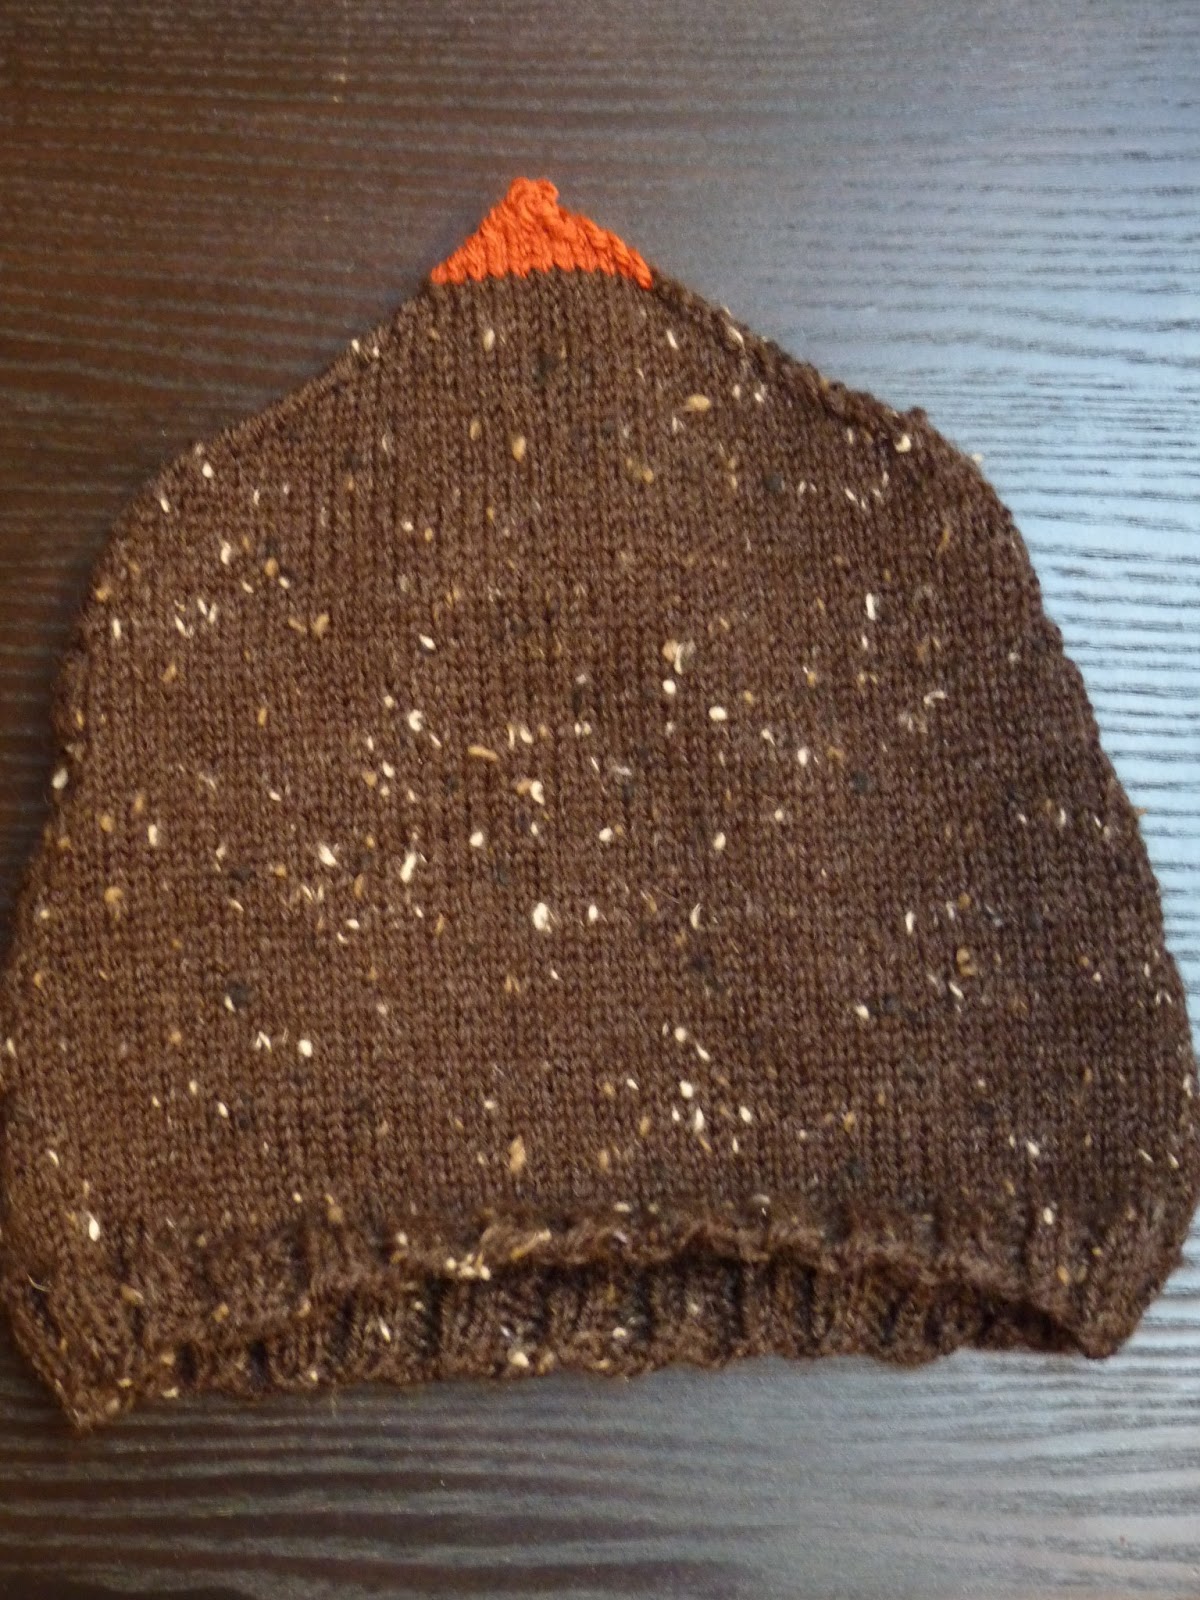
A free simple knitting pattern for a cute reversible owl bobble hat! 


I have been working on this pattern for quite a while, and I’m really pleased with the result. It’s very cute, and can be worn in a number of ways. With both sleepy and awake faces, you can show whichever mood you’re feeling, either with the face showing to the front or to the back. It’s reversible in many ways!


Materials:

3.5mm 20inch circular needles
3.5mm double pointed needles (DPNs)
Stitch markers
For the body- One skein of dk brown wool, a very small amount of orange wool for the beak.
For the eyes- Three colours of wool, using very small amounts (perfect for leftovers!)
For the pom-poms- Same colour as used for body, should be some left from the first skein.


Skills needed:

Basic knit and purl stitches, simple decreases and increases.


Legend:

K= knit
P= purl
sm= slip marker
K2tog= knit two together
SSK= slip, slip then knit these two slipped stitches together as one
KFB= Knit into the front of stitch, do not remove stitch from needles instead knit again into the back of the stitch


Main body of the hat.

Cast on 112 stitches,  join for knitting in the round without twisting.
Rows 1- 5: *K2, P2 repeat from*, placing marker at beginning of round and after 56th stitch, or until ribbing measures desired length .
Row 6: K13, P30, K13, K56 (112 stitches)
Rows 7- 17: K13, P30, K13, sm, K56
Row 18: K2tog, K13, P26, K13, SSK, sm, K2tog, K52, SSK (108 stitches)
Rows 19- 23: K14, P26, K14, sm, K54
Row 24: K2tog, K14, P22, K14, SSK, sm, K2tog, K50, SSK (104 stitches)
Rows 25-29: K15, P22, K15, sm, K52
Row 30: K2tog, K15, P18, K15, SSK, sm, K2tog, K48, SSK (100 stitches)
Rows 31-35: K16, P18, K16, sm, K50
Row 36: K2tog, K15, P16, K15, SSK, sm, K2tog, K46, SSK (96 stitches)
Rows 37 and 38: K16, P16, K16, sm, K48
Row 39: K2tog, K14, P14, K14, SSK, sm, K2tog, K44, SSK (92 stitches)
Rows 40 and 41: K15, P14, K15, sm, K46
Row 42:K2tog, K15, P12, K15, SSK, sm, K2tog, K42, SSK (88 stitches)
Rows 43 and 44: K16, P12, K16, sm, K44
Row 45: K2tog, K40, SSK, sm, K2tog, K40, SSK (84 stitches)
Rows 46 and 47: K42, sm, K42
Row 48: K2tog, K38, SSK, sm, K2tog, K38, SSK (80 stitches)
Rows 49 and 50: K14, P12, K14, sm, K40
Row 51: K2tog, K13, P10, K13, SSK, sm, K2tog, K36, SSK (76 stitches)
Row 52: K14, P10, K14, sm, K38
Row 53: K2tog, K13, P8, K13, SSK, sm, K2tog, K34, SSK (72 stitches)
Row 54: K14, P8, K14, sm, K36
After this row, continue to decrease every row, K2tog after markers and SSK before markers. Change to DPNs when needed (probably when down to 56 total stitches).

When there are 24 stitches left, switch to colour for beak, and carry on with decreases until only 4 stitches remain. Break yarn, leaving a good 10cm tail. Thread through remaining stitches, and pull to cinch together, and then weave in ends.


Eyes.

Awake Eyes:
Cast onto DPNs 9 stitches in black.
Row 1: *K1FB repeat from* (18 stitches)
Row 2: K18
Row 3: Switch to colour 2. *K1, K1fb repeat from *, K1 (27 stitches)
Row 4: Switch to colour 3. K27
Row 5: *K1, KFB repeat from *, K1 (40 stitches)
Row 6: Cast off, leaving a long tail.
Make 2 of these.
For Sleepy Eyes do the same as above, but without changing colours at any point.


You will be left with a hole in the middle of your eyes, but you can easily close the hole in the centre of eyes with the tail left over from cast-on.


Stitch the eyes on, using the tail from cast off. For Sleepy Eye details, just stitch diagonally across the bottom of the eyes with black wool.  


Pom poms.

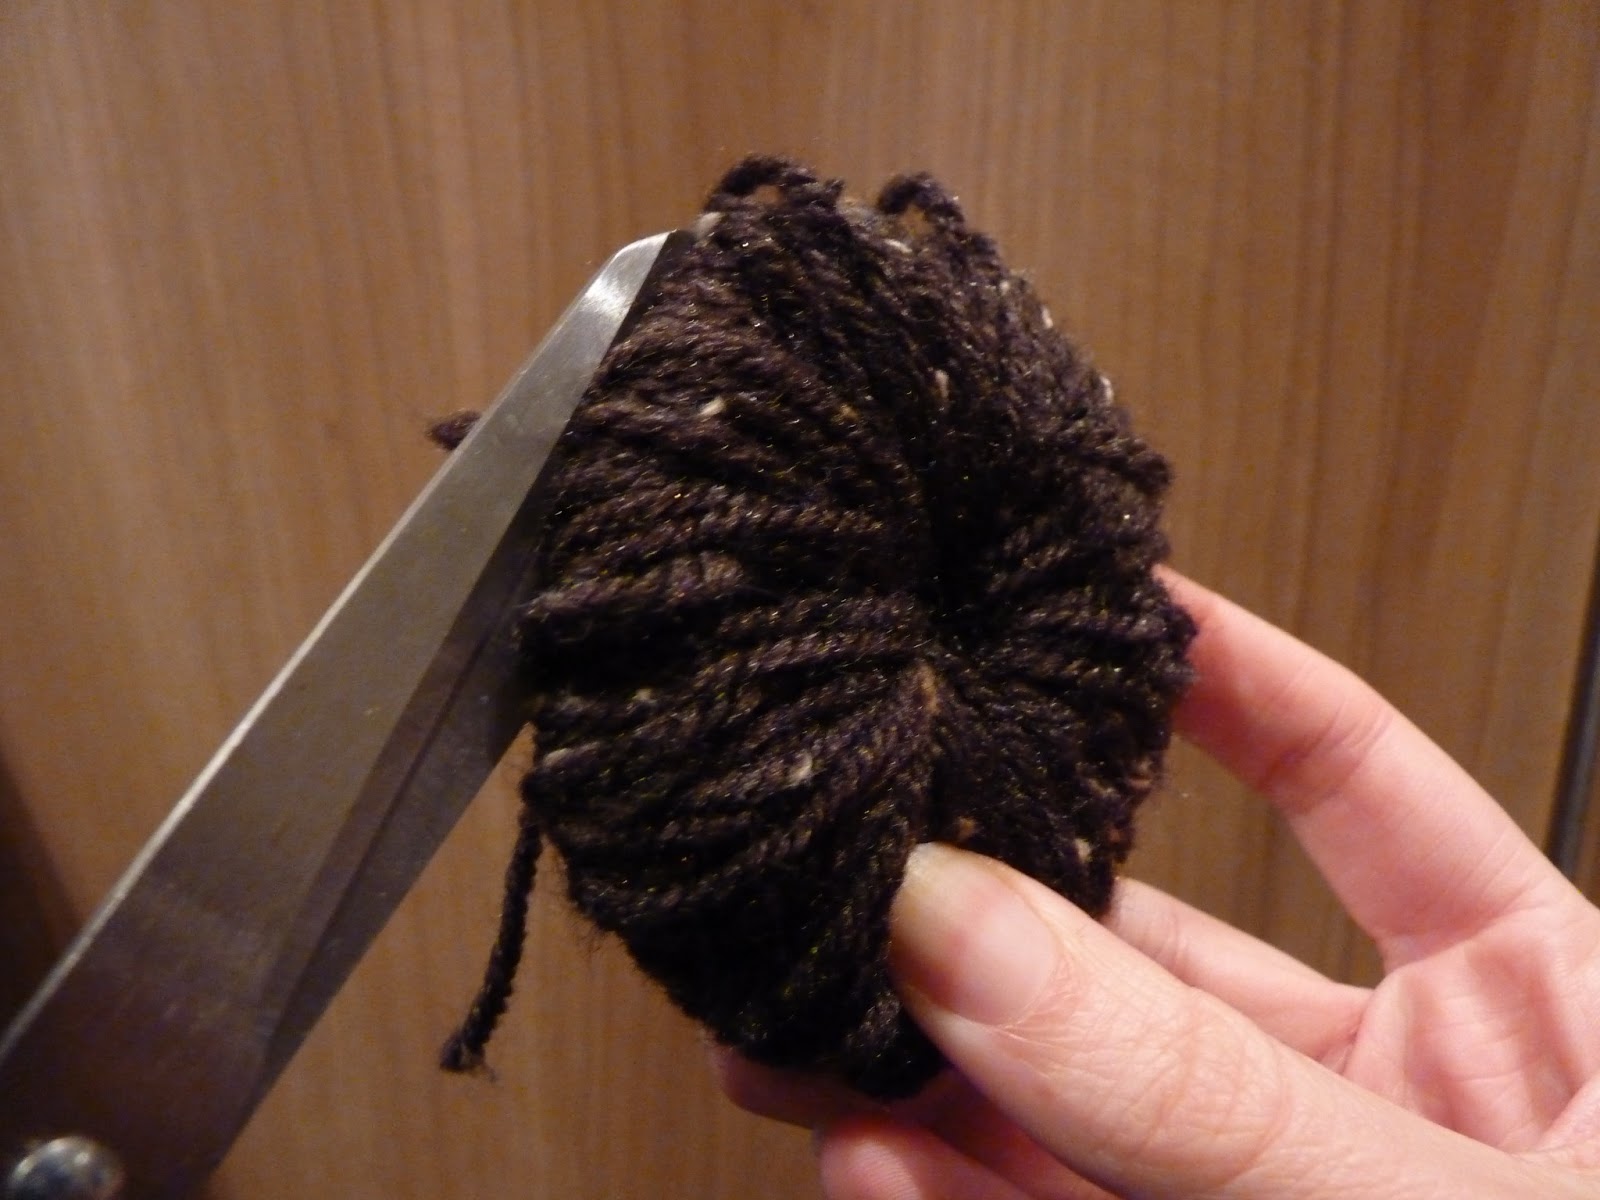
Cut 4 circles out of cardboard, about the size of the bottom of a pint glass. Cut a circle out of the middle (the bigger this inner circle is, the thicker the pom pom will be), and then pair them up. Surround each pair of circles with wool until you can no longer fit any more wool through the centre hole.


Cut around the outer circle all the way around. Very carefully tie a piece of wool around the centre to hold all the wool bits together. 


Stitch to the edges of your hat, so the beak can still be flapped over to change faces.


Finishing.

I stitched a tiny button onto each side of my hat, and then stitched a little tiny loop off the end of the beak so I could decide which face I wanted to show, sleepy or awake, without it flapping over without me noticing.

I also stretched out my hat by fitting it over a colander and dampened it with water, and then I left it overnight. This step is entirely optional.


I really hope you enjoy making and wearing this little owl. Please let me know what you think.


Lots of love,

HanaLou

xxx

Wednesday, 5 December 2012

Basket Weave Fingerless Gloves- Free Pattern!


Now the point of this blog was to write about two of my favourite hobbies, cooking and knitting. And you may have noticed that the knitting has been in rather short supply as of late (sorry!), in fact I have only posted one pattern, my Tidal Cable Headband. 

Now this is not because I haven't been knitting, (I actually feel like I have been doing nothing but knit over the past few weeks!) but because I'm working on some secret projects which I don't want certain nosey members of my household to know about just yet!


However, I can share with you my lovely cosy basket weave hand-warmers (as these are well known of in my circle of friends, so I don't need to keep shtum from prying eyes.)

If you are reading this, I'm going to assume you're interested in knitting. If you're interesting in knitting I'm also going to assume you know all about the Purl Bee and how awesome it is. There are some wonderful patterns on there, not just for knitting but for crochet and sewing and other such noble interests :) 

I fell in love with the Ribbed Hand-Warmers as soon as I saw them, and quickly knitted myself up a pair in a lovely yarn I've been stashing for just such a project. Whilst I absolutely adore them and wear them every day, I've found that I'm not keen on the long length of these. I wear a leather jacket with close fitting sleeves, which the hand/arm warmers just don't fit comfortably under and I wanted a little more flexibility in the palm area. So using the Purl Bee's pattern as a starter I have fashioned a shorter hand-warmer pattern with a stitch which gives a little more width to the finished project in the palm. 

Materials:
1 skein of yarn in a pretty colour (I used a nice green and cream 4 ply yarn, but any would work well, just alter the gauge and/or needle size accordingly)
4 Double Pointed Needles size 3.5mm

Gauge:
13 stitches per 2 inches un-stretched (for ribbing)
9 stitches per 2 inches  comfortably stretched (for ribbing)

Pattern:
Ribbing stitch- 
P3 K2
Thumb Hole Basket Weave stitch- 
Basket Weave Pattern
Rows 1 and 3- K2 P4 Worked on the inside of work
Rows 2 and 4- P2 K4 Worked on the outside of work
Rows 5 and 7- P3 K2 P1 Worked on the inside of work
Rows 6 and 8- K3 P2 K1 Worked on the outside of work
Standard Basket Weave Stitch-
Rows 1 to 4- K2 P4
Rows 5 to 8- P3 K2 P1


Wrist Section:

Cast on 50 stitches on DPNs (I do 20 on the first, then 15 on the second and third but it's up to you).
Join for working in the round without twisting (which impossible to fix after this stage!), placing a marker at the front of the first needle (or use the cast off tail as a marker)
Follow pattern for ribbing until the piece measures 4 inches in length.

Thumb Hole:

Turn the work so you should now be working back on yourself, the same way you have just worked. 

Start the basket weave pattern, starting with Row 1 when you reach the marker turn the work around again to work back on yourself and begin Row 2. Repeat until the thumb hole measures 1 ½ inches.


Working on the inside of your work,
back the way you have just worked.


Working on the outside of your work, as normal.


Hand:

Finishing on Row 4 or 8, join again to work in the round. Continue into the standard basket weave stitch (you should now always be working on the outside of work.) Continue for another 2 inches. Cast off, finishing either on Row 4 or Row 8. Then you can start your second hand-warmer :)


Good luck! I hope you enjoy making these and they keep you super toasty throughout this bitter (but very merry!) season.

Any questions, pop me a comment and I'll try my hardest to fix it.

Enjoy,

HanaLou.

Sunday, 16 September 2012

Tidal Headband- Free Pattern

I've already started crafting some presents for Christmas, as I usually leave it much too late! Not this year. 2012 is the year for only homemade presents! I've already got some chocolate vodka on the go in the cupboard, as well as some Blackberry and Elderberry jam, and hopefully soon to be joined by some Christmas Apple Chutney.

But as well as cooking, I love knitting. The feeling of accomplishment when you finish a project is still makes me proud, and seeing someones face light up when you give them something homemade is lovely. I want to make small accessories for family and friends and have already made some lovely knitted slippers for my mum and boyfriend's mum (pattern downloadable from here), but for my sister and boyf's sister I want to make a lovely warm woolly headband to see them through the miserable English winter. I've made myself one using the wonderful Mari from Wistful Plying's pattern (see her blog here for the pattern), but I have some gorgeous wool left over from previous projects that I want to use and there isn't quite enough left to make them the same one. So I decided to be adventurous and write my very own pattern. I'm pretty happy with it! 


So here it is- my first ever pattern. I'd love it if you let me know if you tried it out and if you think anything needs amending. Or just if you have anything you'd like to say, I'd really appreciate some feedback.


Size 7 needles. Chunky Knit wool.

K1FB= Knit stitch in front and back to increase by one.
K2tog= Knit two together to decrease by one.

Skills needed:

Cabling.
Basic Knit and Purl stitches.
Increase using K1FB and decrease using K2tog.

  1. Cast on 5 stitches.
  2. K2   P1           K2
  3. P2   K1           P2
  4. K2   P1           K2
  5. P2   K1           P2
  6. K2   P1           K2
  7. P2   K1FB      P2
  8. K2   P2           K2
  9. P2   K2           P2
  10. K2   P2           K2
  11. P2   K1FB      K1FB      P2
  12. K2   P4           K2
  13. P2   K4           P2
  14. K2   P4           K2
  15. P2   K1FB      K2           K1FB      P2
  16. K2   P6           K2
  17. P2   K6           P2
  18. K2   P6           K2
  19. P2   K1FB      K4           K1FB      P2
  20. K2   P8           K2
  21. P2   K8           P2
  22. K2   P8           K2
  23. P2   K1FB      K6           K1FB      P2
  24. K2   P10         K2          
  25. P2   K10         P2
  26. K2   P10         K2
  27. P2   K1FB      K8           K1FB      P2
  28. K2   P12         K2
  29. P2 *slip 3 onto cable needle (hold behind) K3, K3 off cable needle* repeat from *-* P2
  30. K2   P12         K2
  31. P2   K12         P2
  32. K2   P12         K2
  33. P2 *slip 3 onto cable needle (hold in front) K3, K3 off cable needle* repeat from *-* P2
  34. K2   P12         K2
  35. P2   K12         P2   Repeat rows 28-35 four/five times (depending on the size of your head/how tight you like it).
  36. K2   P12         K2
  37. P2   K2tog    K8           k2tog     P2
  38. K2   P10         K2
  39. P2   K2tog    K6           K2tog    P2
  40. K2   P8           K2
  41. P2   K8           P2
  42. K2   P8           K2
  43. P2   K2tog    K4           K2tog    P2
  44. K2   P6           K2
  45. P2   K6           P2
  46. K2   P6           K2
  47. P2   K2tog    K2           K2tog    P2
  48. K2   P4           K2
  49. P2   K4           P2
  50. K2   P4           K2
  51. P2   K2tog    K2tog    P2
  52. K2   P2           K2
  53. P2   K2           P2
  54. K2   P2           K2
  55. P2   K2tog    P2
  56. K1   P1           K1
  57. Cast Off. Tie a loop through one end with the tail and sew a button on the other end. Voila! 

You should end up with a nice thin head band with two waves wiggling through the middle. I hope it keeps you nice and snug through the cold months!


As always with these things, please use for personal use only (although selling in aid of charity is fine by me!), and it would lovely if you would link back to my blog if you happen to love it so much you put it on yours :)

Enjoy!

HanaLou.